Hello all !
Oodles of carelessness and broken display glass led me to move down the ladder and use the spare Moto G (Gen 3) at home till the former got overhauled or a new one framed its entry. It took a while to transfer all the stuff and set up apps while praying that data & chats do not get lost during the gloomy move 🙁
So now that all was installed and updated in the tiny old device, I began using the phone as usual till the trouble knocked when the apps asked for certain permissions, the Lollipop style. Granting permissions had always been easier, nothing of a big deal. But this time the warning box “Screen overlay detected” beeped each time asking me to turn off the screen overlay from settings. Trying to disable the particular app’s permission to draw over other apps did not help neither did disabling the same for all the apps in the phone, I even tried tinkering with the System Apps.
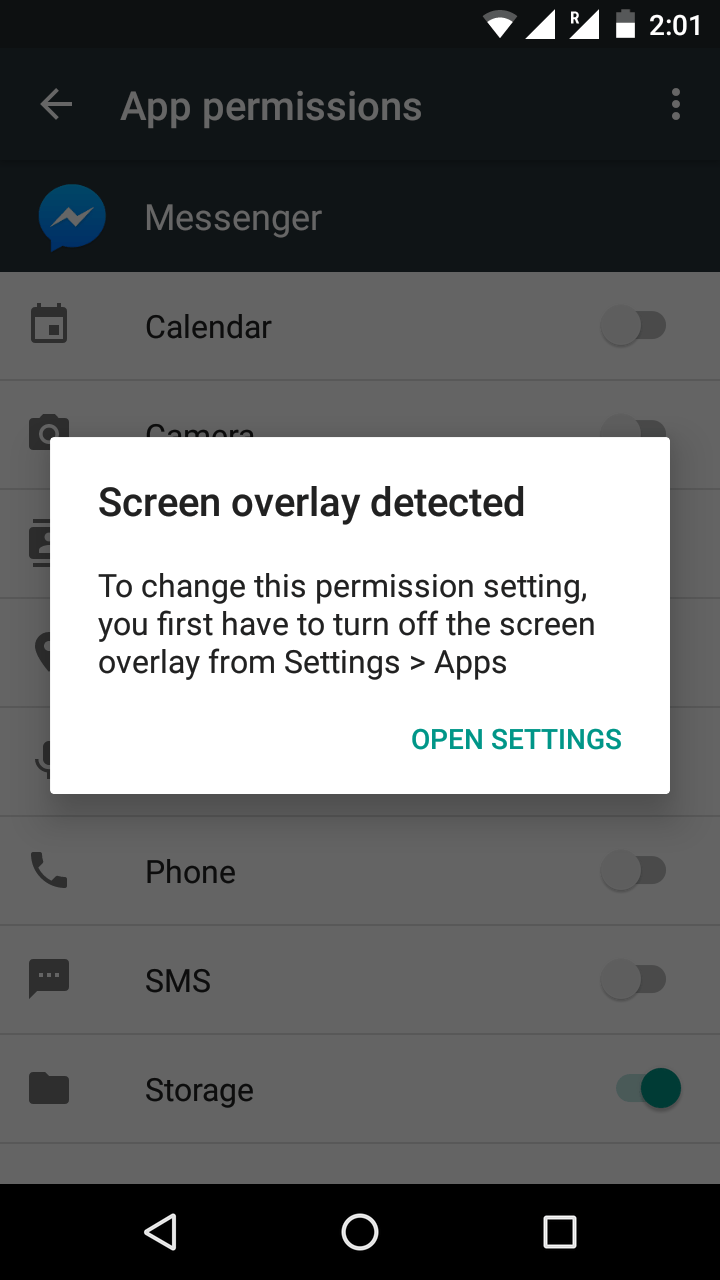
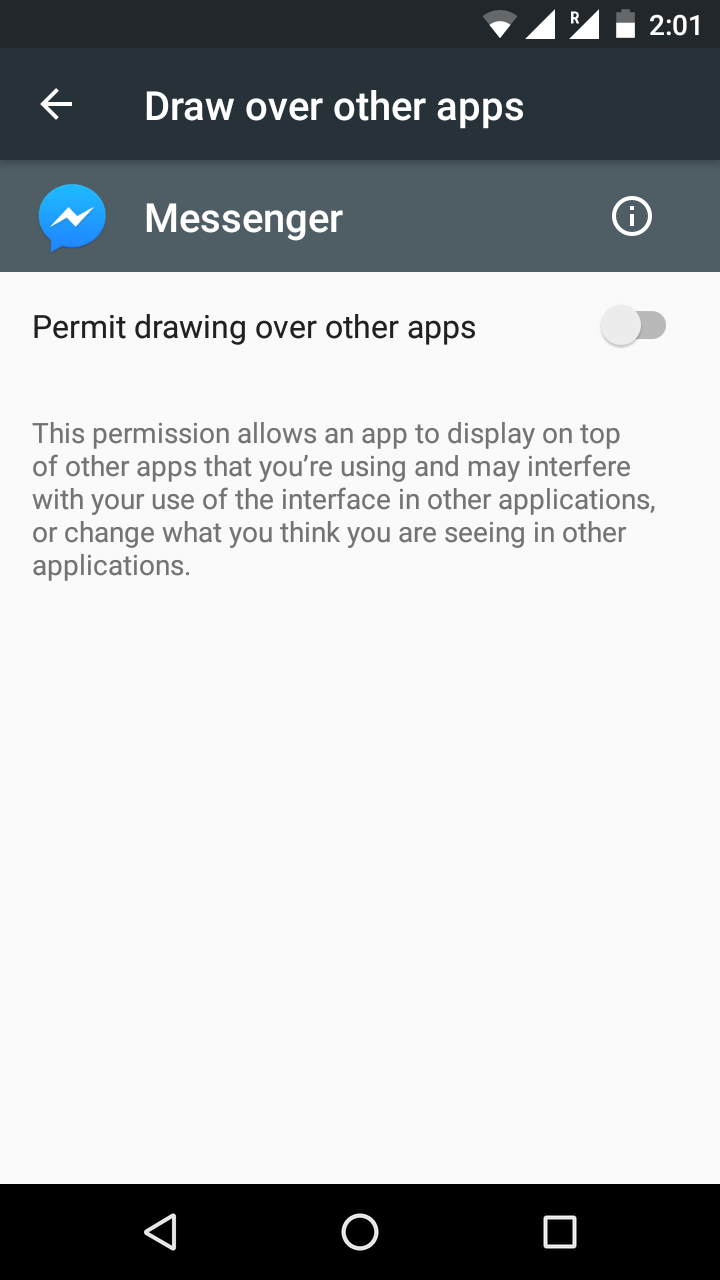
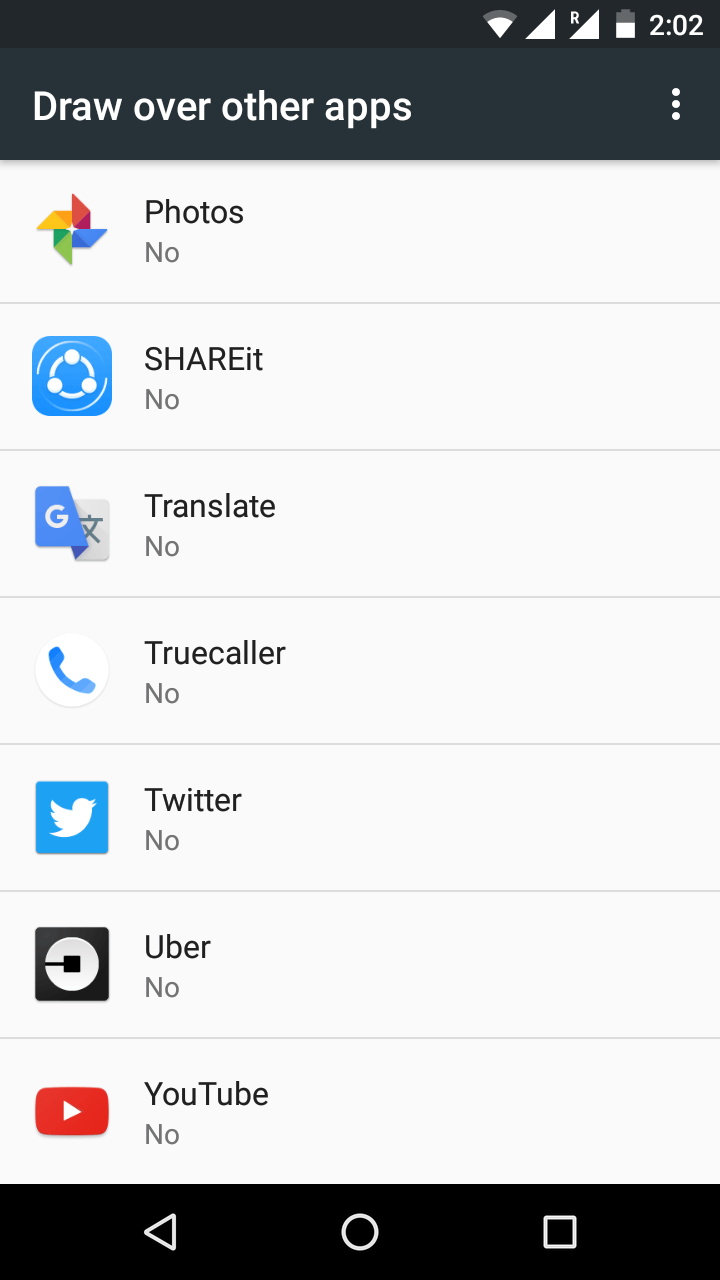
I was fed up of the endless loop I was stuck in, trying to grant permission, disabling the permit to draw over the other apps (which is already now off) and so on. And then it came across, like a tiny sparkle on the dull canvas ~ “Trying to grant the permissions manually via the ADB ?”
Android Debug Bridge (adb) is a versatile command-line tool that lets you communicate with a device (an emulator or a connected Android device). A client-server program, it provides access to a Unix shell that you can use to run a variety of commands on a device.
Frantically, I started googling to find the right way to do the needful. I started off with downloading the ADB package with SDK Manager in Android Studio, which installs it at android_sdk/platform-tools/. I installed the package using Android Studio as I had a bit of experience with it before, but one can also download standalone Android SDK Platform-Tools package from developer.android.com/studio/platform-tools
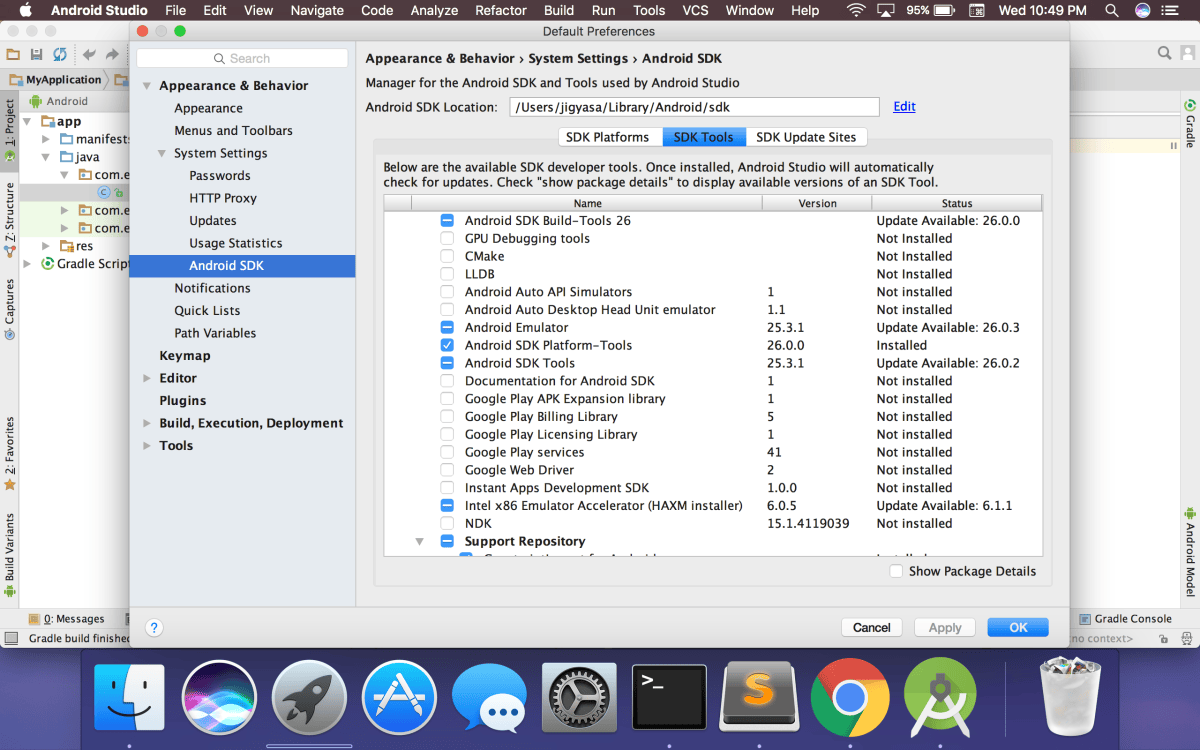
“Android SDK Platform-Tools” are installed with the latest Version 26.0.0
Glad, that the package was smoothly installed I casually tried the following in the terminal which gave a very sad response 😅
Jigyasa's MacBook Pro:~ jigyasa$ adb
-bash: adb: command not found
Jigyasa's MacBook Pro:~ jigyasa$ adb devices
-bash: adb: command not found
I realised I had to find the exact location of the Android SDK Platform-Tools package and add it to the PATH environment variable. By default, the package is located at /Users/<user>/Library/Android/sdk/platform-tools/adb. The next steps included creating the .bash_profile, adding the PATH environment variable by opening the .bash_profile, adding export PATH=$PATH:[your SDK location] /platform-tools to the file, hitting ⌘s to save it and finally loading the variable.
Jigyasa's MacBook Pro:~ jigyasa$ cd
Jigyasa's MacBook Pro:~ jigyasa$ touch .bash_profile
Jigyasa's MacBook Pro:~ jigyasa$ open .bash_profile
Jigyasa's MacBook Pro:~ jigyasa$ source ~/.bash_profile
Jigyasa's MacBook Pro:~ jigyasa$ adb
Android Debug Bridge version 1.0.39
Revision 3db08f2c6889-android
Installed as /Users/jigyasa/Library/Android/sdk/platform-tools/adb
The next steps were super easy, connecting the device in the debugging mode and running the command using the template adb shell pm grant <app’s-package-name> android.permission.<specific-permission-to-be-granted>.
For instance, I tried the following commands for WhatsApp:
Jigyasa's MacBook Pro:~ jigyasa$ adb shell pm grant com.whatsapp android.permission.CAMERA
Jigyasa's MacBook Pro:~ jigyasa$ adb shell pm grant com.whatsapp android.permission.READ_CONTACTS
Jigyasa's MacBook Pro:~ jigyasa$ adb shell pm grant com.whatsapp android.permission.WRITE_CONTACTS
Jigyasa's MacBook Pro:~ jigyasa$ adb shell pm grant com.whatsapp android.permission.GET_ACCOUNTS
Jigyasa's MacBook Pro:~ jigyasa$ adb shell pm grant com.whatsapp android.permission.ACCESS_FINE_LOCATION
Jigyasa's MacBook Pro:~ jigyasa$ adb shell pm grant com.whatsapp android.permission.ACCESS_COARSE_LOCATION
In case of Facebook (com.facebook.katana), here we go:
Jigyasa's MacBook Pro:~ jigyasa$ adb shell pm grant com.facebook.katana android.permission.READ_EXTERNAL_STORAGE
Jigyasa's MacBook Pro:~ jigyasa$ adb shell pm grant com.facebook.katana android.permission.WRITE_EXTERNAL_STORAGE
Jigyasa's MacBook Pro:~ jigyasa$ adb shell pm grant com.facebook.katana android.permission.ACCESS_FINE_LOCATION
Jigyasa's MacBook Pro:~ jigyasa$ adb shell pm grant com.facebook.katana android.permission.ACCESS_COARSE_LOCATION
Jigyasa's MacBook Pro:~ jigyasa$ adb shell pm grant com.facebook.katana android.permission.RECORD_AUDIO
Jigyasa's MacBook Pro:~ jigyasa$ adb shell pm grant com.facebook.katana android.permission.READ_PHONE_STATE
Jigyasa's MacBook Pro:~ jigyasa$ adb shell pm grant com.facebook.katana android.permission.READ_CALENDAR
Jigyasa's MacBook Pro:~ jigyasa$ adb shell pm grant com.facebook.katana android.permission.WRITE_CALENDAR
For someone who is looking for the exact permissions that can be granted, a cheat sheet like the following might help.
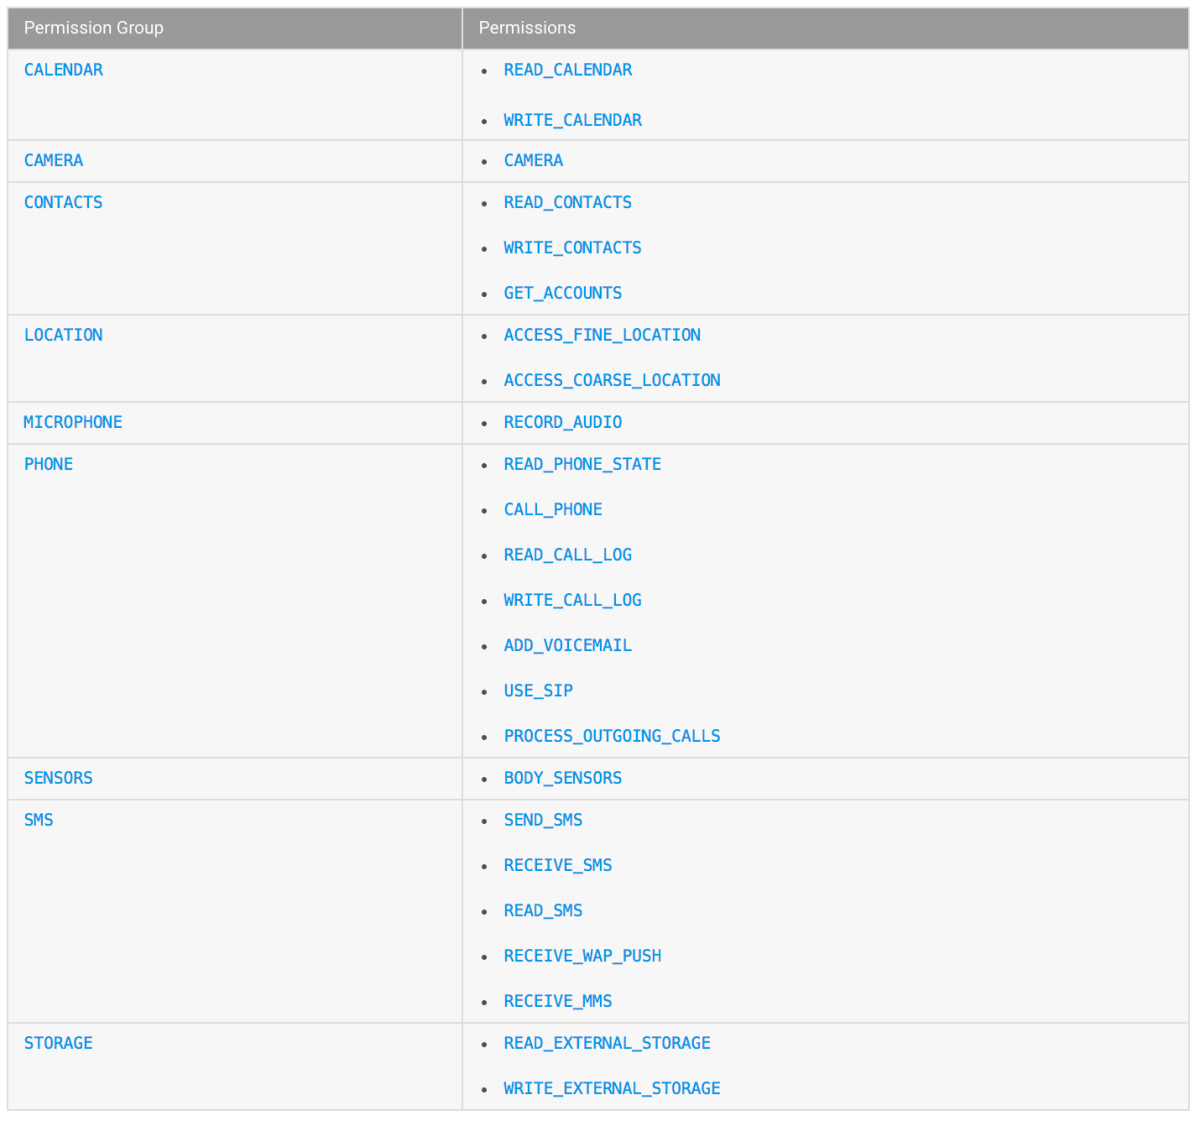
Android permission groups. (source: developer.android.com/guide/topics/permissions)
I am still stuck in the loop if I try to do it the layman’s way using the GUI. If any one of you who can help with it and has any pointers, I shall be really grateful. Till then, doing it the hacker-way. Hope this trick helps someone in the same muddle 😇